Sunday 3 February 2013

Settlers of Cataan Board for my son.


via LumberJocks.com RSS Feed - All Posts http://lumberjocks.com/projects/79036

Settlers of Cataan Board for my son.


My son ask me to make him a Settlers of Cataan game board for about two years ago. Well I finally completed it in time for Christmas last year. The board is made with cherry, wenge and pine – the case is cherry, wenge and birch. The game tiles are poplar, I then found appropriate pictures of the corresponding landscape for the tile on line and printed them out on photo paper which I then glued to the tiles. The game board and case were finished with 5 coats of tung oil while the game tiles were finished with 5 coats of spray on satin polyurethane.


Crafty Puzzles

Workbench Build #4: More work on the vise plus a failed trip to the local mill...


via LumberJocks.com RSS Feed - All Posts http://lumberjocks.com/Airframer/blog/34336

This morning I went over to my bosses house so we could weld up the bolt bracket for the leg vise. He had some scrap plate metal on hand and a plasma cutter (want one lol). He made quick work of the job and within an hour I have a rough plate with a large bolt attached to it.


He left it up to me to clean it up and drill the mounting holes plus I owe him lunch tomorrow heh. He ALSO gave me a practically new angle grinder so I can cut up the 6’ rod to length so that is a bonus. either I am about to get screwed over at work and he is softening the blow or he was just feeling generous either way I am a happy camper.


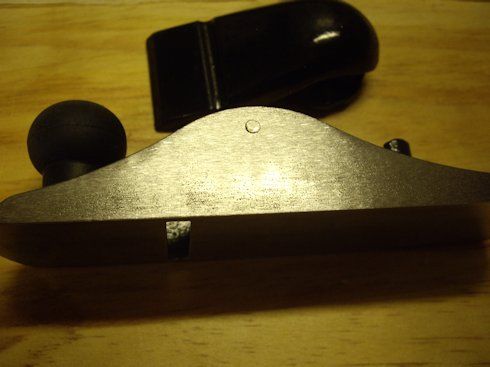
(sorry ‘bout the blurry pic..)


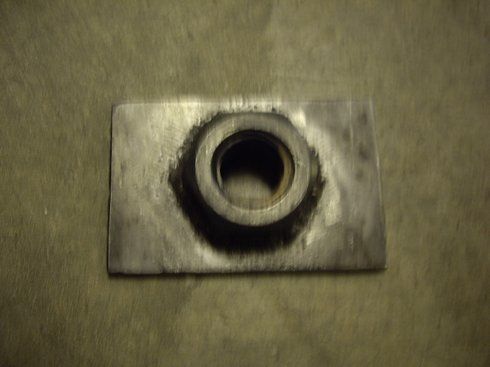
The back side. He flush mounted it through the plate.


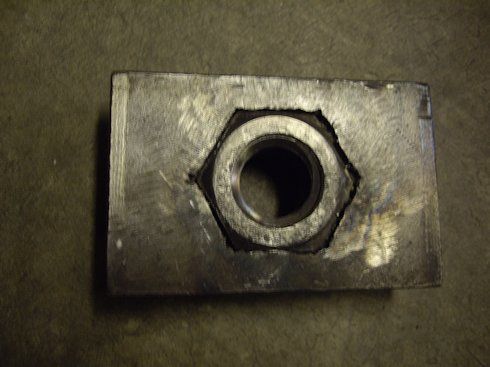
Like I said I just have to clean that up, drill 4 holes and shoot it with some gloss black enamel.


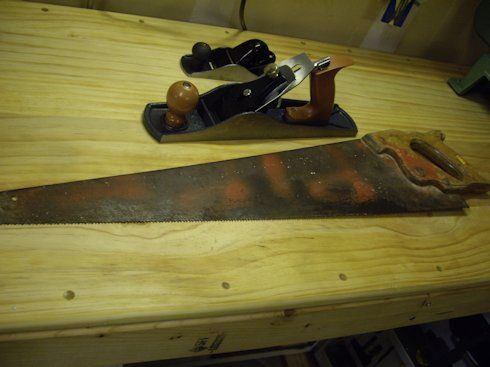
I also stopped by ACE hardware on Sat to look at their pipe fittings to try and piece together the hub and flange for the wheel portion of the vise.


I initially came up with this stack up..


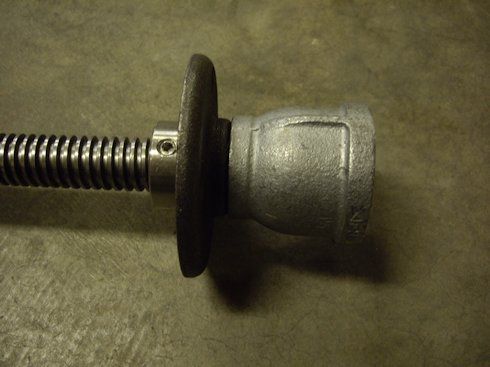
But after fiddling with it I’m just not happy with how smooth it spins. So I have placed an order with Reid Supply for a flange mounted bearing with 2 set screws to use instead of that floor mount flange. My only concern about the bearing is how well it will handle the side pressure from clamping but I am willing to give it a try. It was cheap enough to test out.


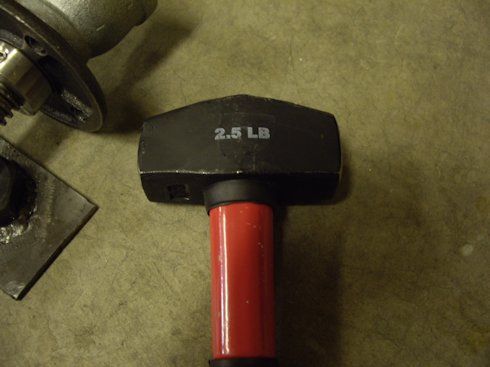
I am still waiting on the hand wheels to arrive so untill then any type of mating hardware is all theoretical until I have the actual wheel in hand to see how it is shaped on the rod side. They do have a line drawing on their site with dimensions and it says that the hub is 1 7/8” in diameter. I measured the inside diameter of the reducer I am going to use to mate the rod to the hub with and if you measure in the grove of the threads it is Juuuuuuuuust a hair smaller than 1 7/8”. This means that depending on how exactly the hub follows the line drawing I could very well just hammer this thing onto it and it would never go anywhere. I got a special hammer for that task :D Gotta love a BFH!


So that is one option. The other is to grid it out till it slips over and secure it with a set pin. Once the wheels arrive I will be able to finalize the puzzle.


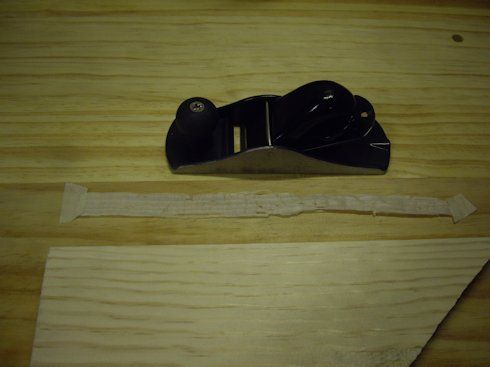
One other addition to the vise hardware is a thrift store find of quite possibly the ugliest dress anyone has ever seen. I spotted it while the wife was browsing maternity wear and when I saw it hanging there it dawned on me that I need some suede for the vise jaws. This is all suede and only cost me $9! Plenty there for multiple projects.


In other news. I made a stop at my local lumber supplier here on the island. They have a nice variety of hardwoods and exotics but only carry 4/4 stock and I need 8/4 (at least would like 8/4). They had some zebra wood there that I might pick up for some accents on the bench but so far no wood for the top to be found anywhere. I still have a couple more options but they are either a Ferry ride away or an hour drive north. So considering that I will need to recruit someone with a truck to haul it to my house I need to know for sure what they have. Uncle Sam is supposedly releasing my money tomorrow so I can finally start seriously considering the wood choices on this.


I am really hoping to start making saw dust by next weekend but we shall see how the ride works out this week. Hopefully someone will be willing to go looking at wood with me (sounds worse that it was ment to sound…)


Thanks for reading and updates to come. Advice and suggestions are always welcome.


Crafty Puzzles

Hand Tool Journey #3: One down.. and the next set of victims


via LumberJocks.com RSS Feed - All Posts http://lumberjocks.com/Airframer/blog/34334

I am not much of a fan of football so today’s game I could give fewer you know whats about. So I spent the day in the shop finishing up my cheepie plane tune up. I got the blade finally honed and sharp. I then sanded the paint off the sides since I had scratched it up a bit I also removed the paint from the area where the blade contacts the base. The back of the blade is bare but there is a coating on the top side which doesn’t seem to interfere with anything so I left that alone.


Once reassembled and blade depth set I grabbed a scrap piece of pine and tested it out and I have a couple “money shots” for you guys. This little guy has turned into a usable tool to add to the shop surprisingly so I am pleased with the work I spent on this.


Here are the after pics..


Money Shots!! My first full length paper thing shaving!


Now since that went so well I felt a little better about purchasing another Buck Bros plane. This one actually got some decent reviews online and from what I have read it just needs a couple tweaks to make it a good little “learning” hand plane (the wordage used in multiple reviews). It is a 14” “No. 5” Jack Plane for $34.


I haven’t had a chance to use it yet but, first impressions are that it seems to have good “bones”. It is superior in quality to the other BB plane I just finished tuning and has a lot of features you find on some of the more expensive models. So for under $40 I have taken a chance on it and we shall see how it goes. I still need to hone the blade and clean off the shipping goo from the bottom and sides. I’ll update you guys on how it works.


I am still waiting on my new model Stanley No 4 to arrive (supposed to be here Thurs). Again full review once that arrives too.


Till then these “Bros” will be what I have to work with..


Another find from this weekend is a cross cut hand saw from our local thrift shop. We were in there Saturday looking for baby stuff and some maternity cloths for the wife and I spotted this among the detritus laying about. The handle needs some work and the blade needs to be cleaned but for $3 it cuts good and fast so it’s a keeper.


Does anybody recognize this emblem? Is it a clue to the brand? I figure it is just a random cross cut saw but ya never know..


It seems I am on my way down the rabbit hole and keeping to your warnings I have resisted the urge to start trolling flea bay but…. that might not last long!


Crafty Puzzles

Daily Sudoku: Mon 4-Feb-2013


by via The Daily Sudoku

Daily Monster Sudoku: Mon 4-Feb-2013


by via The Daily Sudoku

Daily Squiggly Sudoku: Mon 4-Feb-2013


by via The Daily Sudoku

Spin Tops


via LumberJocks.com RSS Feed - All Posts http://lumberjocks.com/projects/79022

Spin Tops


Ok Super Bowl Sunday, had a few hours to kill before the big game. Made a few string style spin tops, 1 out of the colored plywood and 2 from walnut. Takes a bit to figure how to make make them spin but I have that down now. Fast, easy project, look great, fun to play with. Will be making lots of these. Will be great gifts for my nephews.


The one on the left is solid plywood. Does not spin well, too top heavy. It was one first one I made last weekend.


The others have a 1 1/4” wide inch hole drilled in the top and work much better. The hole is about and 1 1/2” deep. Then drilled a hole in the point and inserted a brass metal point. Finished with Mylands turners finish. The brass tips makes a huge difference how well it spins.


Bob Feb 3, 2013.


Crafty Puzzles

The Hidden Chairs


via Mighty Optical Illusions http://www.moillusions.com/2013/02/the-hidden-chairs.html

The Hidden Chairs The Hidden Chairs These chairs are something you do not get to see every day. Collection titled “The Hidden Chairs” by French design studio Ibride provides this beautiful, intriguing animated optical illusion you see on your right. It blew my mind first time I saw it! All of the chairs from mentioned collection look irregular and warped, but when you see them from a specific angle, their shape will remind you of the classic design.


When you see each of the chairs from a specific angle, you might easily mistake the right way to sit on them. Gallery below depicts this perfectly! The Hidden Chairs line includes three beech plywood chairs that follow three historical designs: “The Hidden Shaker”, “The Hidden Terence” and finally “The Hidden Wagner”.


Paris-based design trio Ibride comprises graphic designer Rachel Convers, designer Benoît Convers and editor Carine Jannin. The furniture was shown at Maison&Objet design fair in Paris, which finished last week. Let’s see if they manage to trick you as well!


The Hidden Chairs


The Hidden Shaker is inspired by the austere furniture of the Shaker religious movement.


The Hidden Chairs


The Hidden Wagner is inspired by the furniture of nineteenth-century Viennese architect Otto Wagner


The Hidden Chairs


The Hidden Terence references a typical Ming dynasty Chinese armchair with a horseshoe-shaped back.


Crafty Puzzles