by via The Daily Sudoku

When I moved in to the new cave (from our living room…) I’d already had its plans in my head – roughly but the functions were clear. Table saw, router table, both with dust collection, table saw sled, fence, drawers and a bit rack with all my drill bits and router bits in the top drawer.
Table saw
I know it sounds weird but I just don’t feel justified the price for any table saw. I’m probably wrong but this setup works just fine for me. Just have a look at this crosscut. It’s like a mirror. (Photo 6) OK, it’s made by the smallest high end Bosch blade (laser cut, non sticking, bla-bla) squeezed in an industrial grade Bosch circular saw. DON’T DO THIS. To build this kinda setup I had to remove the blade guard which allowed me to use a ¾” bigger blade (since in this category that is the smallest blade from Bosch). Removing the guard and cutting a hole on the housing of the blade allowed me to attach an improvised dust hood that makes dust collection quite acceptable. This removable ½” plywood gadget is one of my favorite part of this whole workstation. It’s made from a single piece of scrap.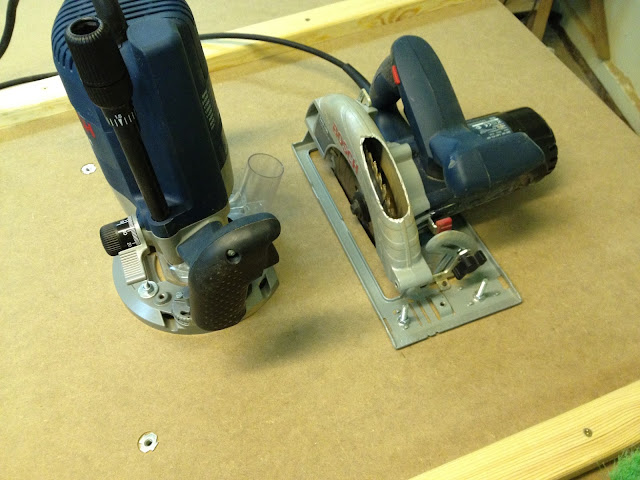
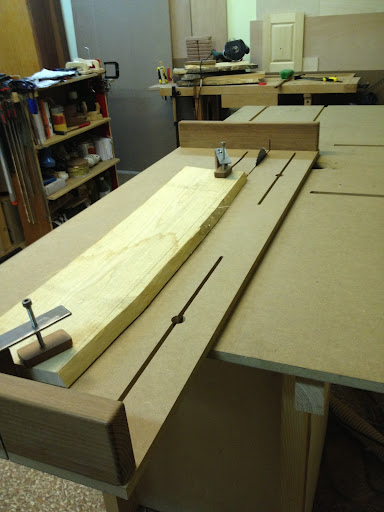
First I thought I make this table with insert plates but eventually I chose the fixed design with a folding ¾” MDF top. It has zero clearance by design which means I don’t tilt it. I wouldn’t do that. I would rather put a miter jig on my sled. It has two slots for the sled so I decided to reinforce the top with two sticks of wood avoiding breaking the top (at the notches) when folding up those 50 pounds. These sticks, legs, rails and stiles are Scots pine, knot free even though it comes in 17’ long 8-12” wide slabs (from Siberia). Its scent is even more pleasant than its look. The surfaced size of the legs, rails and stiles is 2×4”. That’s why it is rock solid and weighs about 300 pounds. My workbench is ultra lightweight compared to this. Especially when the drawers are in and fully loaded with power tools, accessories, metal parts for jigs, finishing stuff and so on; then its weight doubles. So when I want to clamp down something big, I fold up the top and I clamp the work piece to the frame.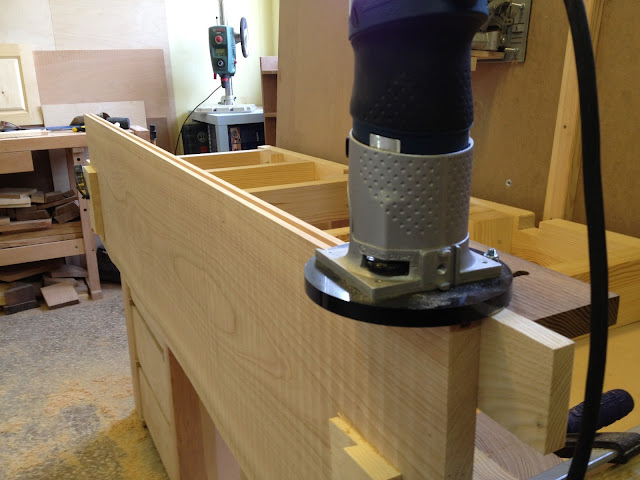
Table saw sled
This is the most appropriate name for it because I use it for rip cuts just as much as for cross cuts. This has two reasons. First, I buy my lumber rough sawn (but well seasoned) so when I don’t want to use live edges I have to rip off the edges. Second, I haven’t built in a riving knife so when I want to rip a board to make sticks which are less than 3” wide then I avoid using the fence. It is much safer to do it clamped down on the sled. The clamps are designed so that they can flex enough to keep the work piece clamped even when a cupped rough sawn board collapses during a rip cut. The base plate is pretty thick being ¾” MDF but usually I don’t miss the lost cutting capacity. The handle and the clamps (photo 4) are steamed black locust. The metal plates of the clamps come from a really versatile commercial half blind dovetail jig… (Grin)
Three purpose fence
Like the sled this also has two main uses but I use it much more for routing than for rip cuts (no riving knife, remember). I recently added a third function to it. It’s made of ¾” MDF, it’s also heavy. Dust hood is built in. It’s held down by hex screws.
Router table
Unlike for a saw, I happily paid three times more for the biggest fanciest Bosch router on the market because I knew I would use it a lot. (Well, mostly because I love wide boards and big slabs and their surfacing requires some power and stamina as well – imagine surfacing a hundred bf of black locust…) Praising this router is not the point of this post but I have to mention that this router is MEANT to be built in a router table. And its features make its use really convenient. For example setting the depth of cut, turning off the spring (which is not even mentioned in the manual although it has a dedicated button) are the most important for me. (I think I should post a review about this router soon.)
Great capacity
The drawers are the soul of this workstation. When I completed them I had to reorganize the workshop because they swallowed all my tools and accessories of all kinds. It was such a relief that I don’t have to run three rounds in the shop to find a hex wrench or a try square, etc. It was worth every invested second. Even if I count the days in the hospital… but that’s another story.
The drawers are some kind of an experiment, too. They’re held together by friction – the dovetails are so tight that I had to hammer them in each other. The front and sides are spruce and the bottom is plywood, what else. :) I’m going to miss its simplicity in our home furniture but principles are principles. :) The other aspect of the experiment is the drawer slides. It uses the fact that jointed black locust surfaces slides on each other surprisingly smoothly. (Sanded surfaces behaves completely otherwise even when sanded to zillion grit.)

Bit rack
Some people are anxious to get a new plane, some people are mad about router bits. As you can guess the latter applies much more for me. I have a good basic set of router bits but I think I need another dozen… (My problem comes partly from the fact that only my big router can accept 12 mm shank bit and I rather keep that tool in the table. So it looks I’m going to collect routers instead… LOL) I was harsh to myself when I designed this bit rack – I made only four spare holes… By the way making these holes was a bit tricky. I had thought it would be much easier but when I made a hole with a 12 mm drill bit, I could hardly squeeze the router bit in to the slot. So I put a 12mm router bit in the drill press to widen the holes by about 0.1 mm. The size became perfect – the shank slips in to the slot with no effort. I did the same with the holes for 8 mm shank bits.
Before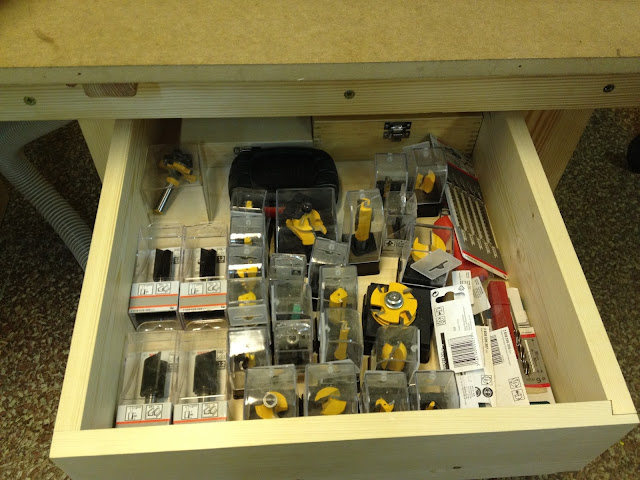 After
After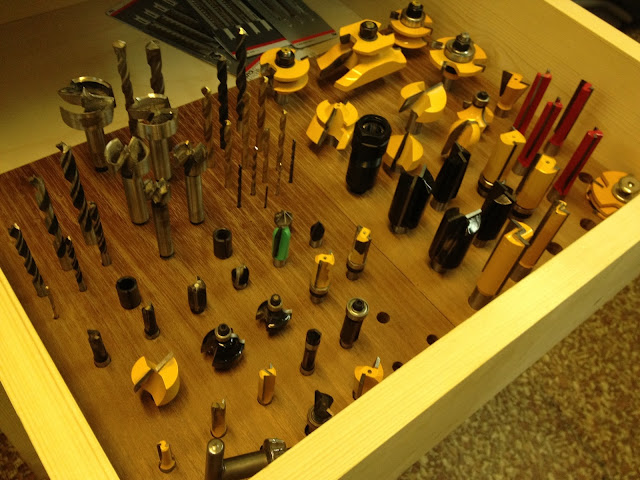
Dust collection
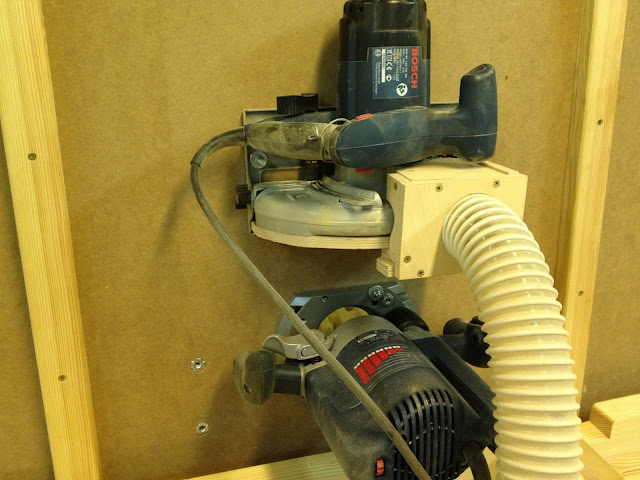
Since this table has two power tools making tons of dust I had to come up with some gadget which can integrate their dust flows and I can switch from one to another source of dust. Plywood Goddess provided the solution again. Full solution, no restrictions. She’s too kind to me even though she knows I won’t let her in to our home…
Two flows from above and two directly from the power tools can be combined in the rear box on this workstation. A blast gate switches the suction from the router (with the fence) to the saw. The adjustable overarm dust hood for the table saw is not done yet.
Electric puzzle
(photo 5)
Well, having two basically hand held power tools built in a table requires some order in their electric supply – especially if you want to control the dust collector at the same time and to integrate some plugholes.
I can switch on the plugholes separately from the rest. The rest can also be switched on separately – I can switch on the DC alone (when it’s needed to the jointer/planer) or if I want to switch on the saw or the router, the DC switches on at the same time. It might look and sound difficult but the switches are configured so logically that I didn’t need any label on them.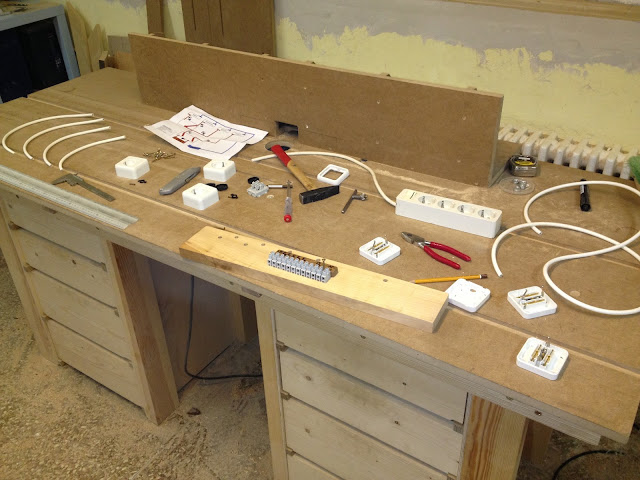

This workstation works as a workshop and behaves like that in a sense that it is never completed. I think I’ll add casters, foldaway extension(s) as well. And there is enough space for another two big drawers in the middle. Shall I go on? :)
Thanks for reading along,
Johnny
As I plan the new shop, I’ve come across a common spec. for electrical panels that puzzles me. OK – save all the buzz about – if you don’t know this, you should hire an electrician before you burn the place down.
Common to many GE and other panels, I see the statement “neutral holes sized to 14-4 wire”. These include 125A panels with 14 spaces (what I’ll probably use), as well as 200A panels with 40 spaces. My confusion lie in the 14-4 size statement. I’ll have a bunch of 20A circuits for tools and lights and one 30A circuit just in case I ever decide to upgrade from hobby-sized tools to a bigger table saw. My plans include using lots of 12-2 wG for most of the circuits and 10-2 wG romex for the 30A circuit. So just what is the 14-4 statement about since not many folks use size 14 wire? – Thanks!